
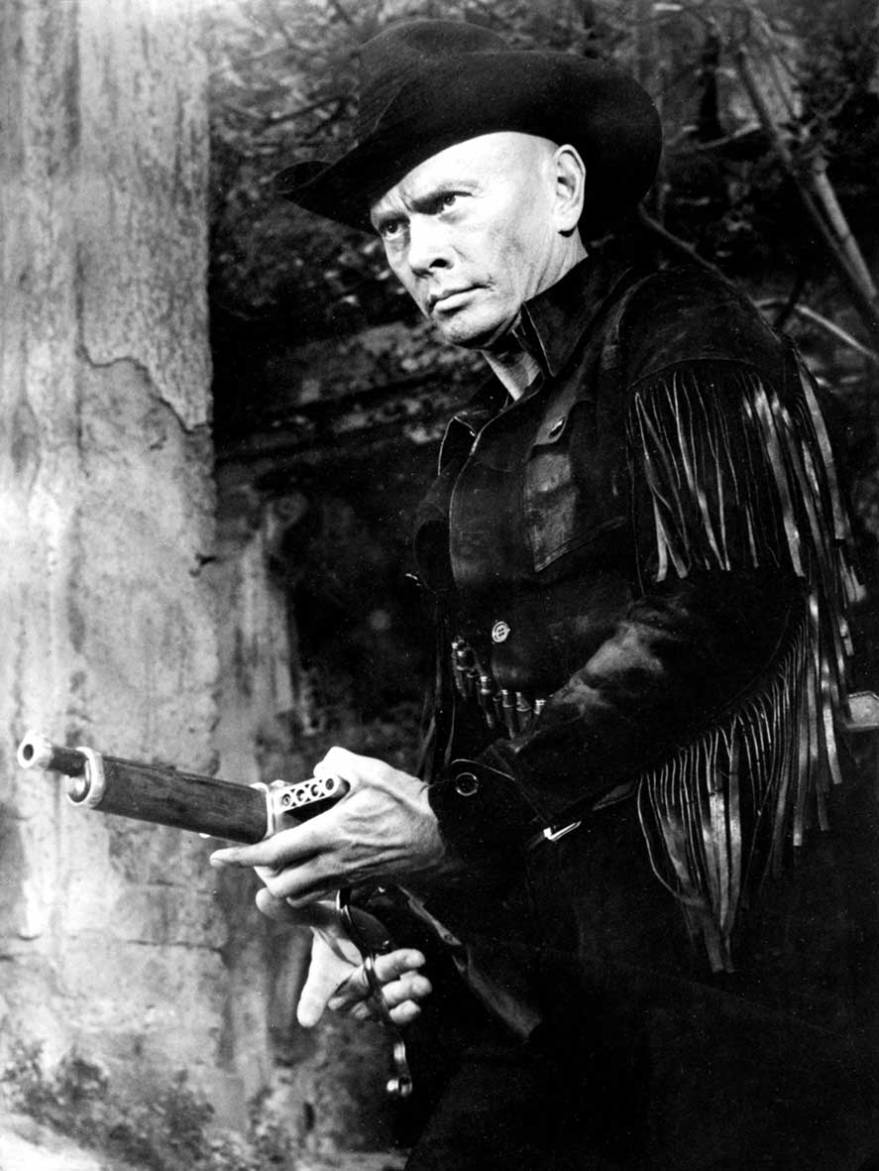
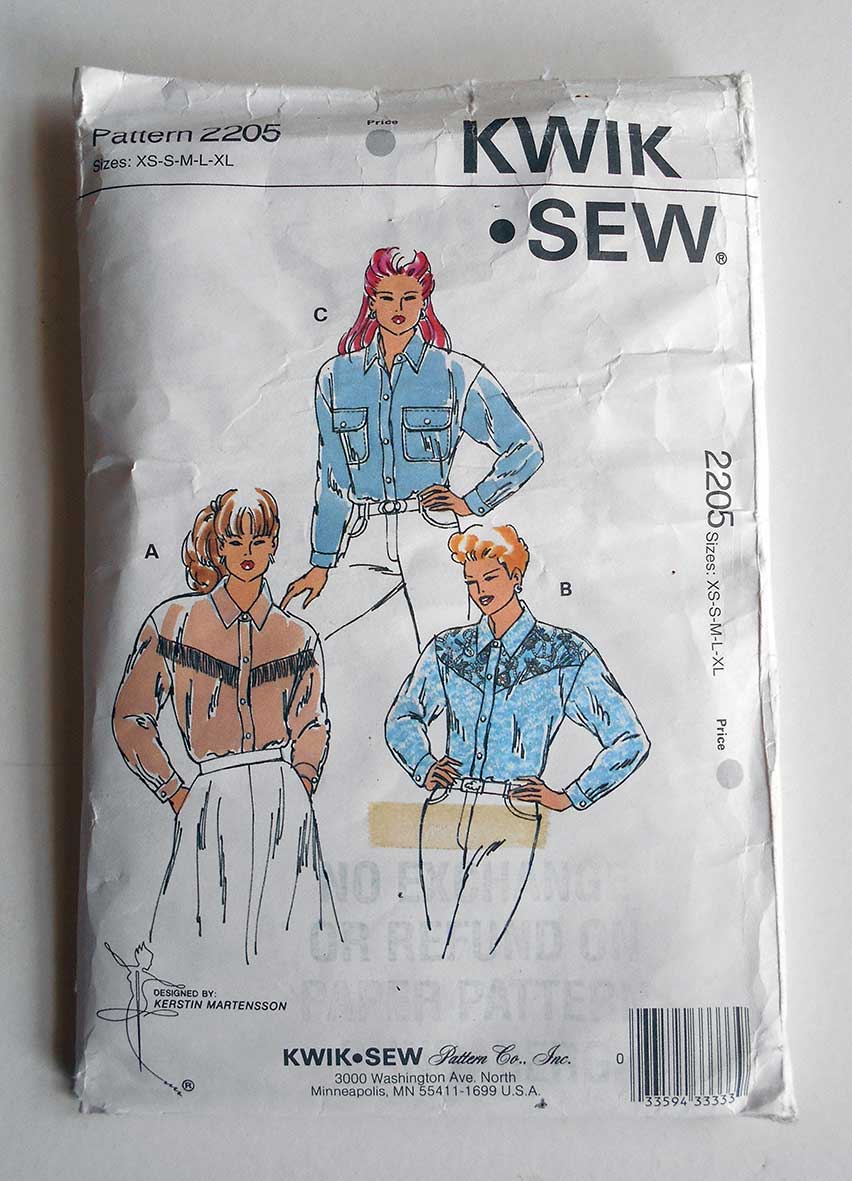
Last year I picked up a vintage 1992 Kwik Sew cowgirl shirt sewing pattern. It was a bargain from an op-shop in Texas, Queensland not far from our family property at Beebo. I decided to use it as the signature piece for a new fashion ensemble based on the classic bad guy cowboy look, think Yul Brynner in his Western roles.
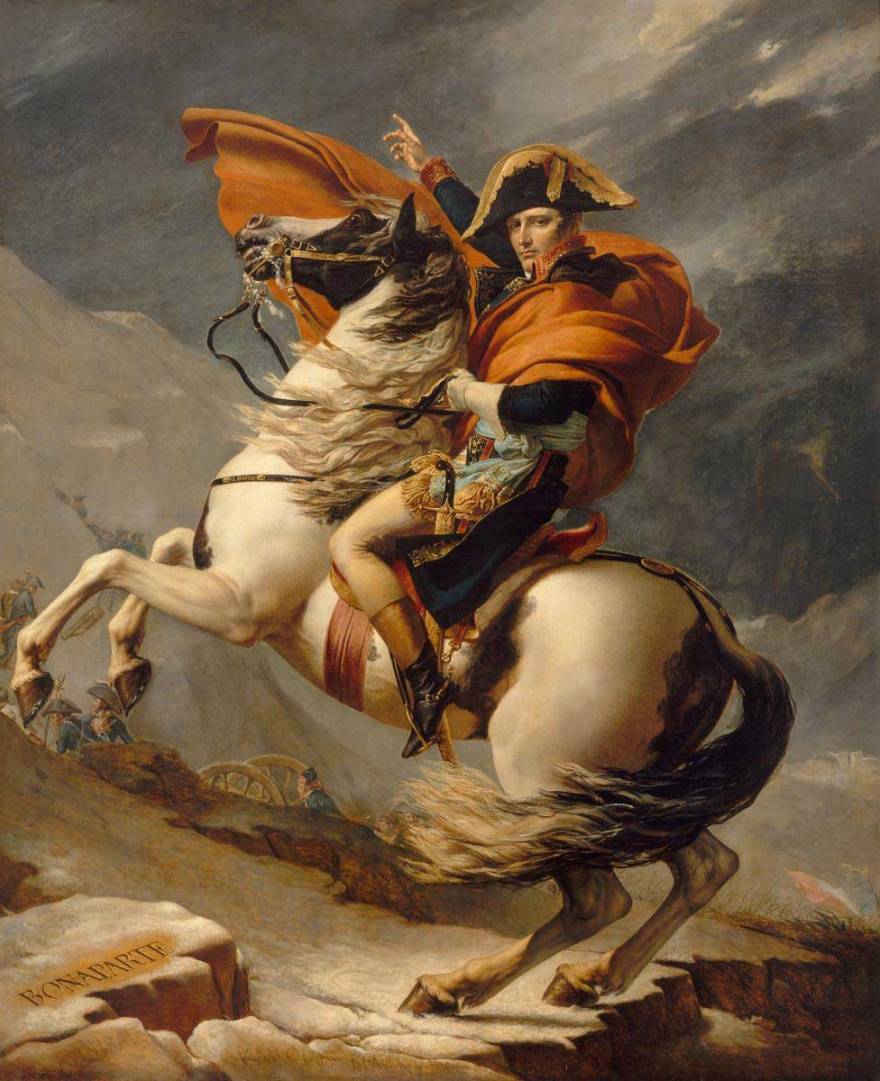
While brainstorming my project I started to wonder about the roots of the cowboy shirt. There is a certain contradiction inherent to them. Usually they feature a degree of decoration making them glamorous yet if you think about their association with rodeo and the Wild West they are incredibly macho at the same time. Such a mixture of beauty and bravado brought to mind the garb of Napoleon Bonaparte who was often portrayed in dashing military dress. You may have seen him famously depicted on horse back in such get-up in an 1803 portrait by his pet propagandist French painter Jacques Louis David.
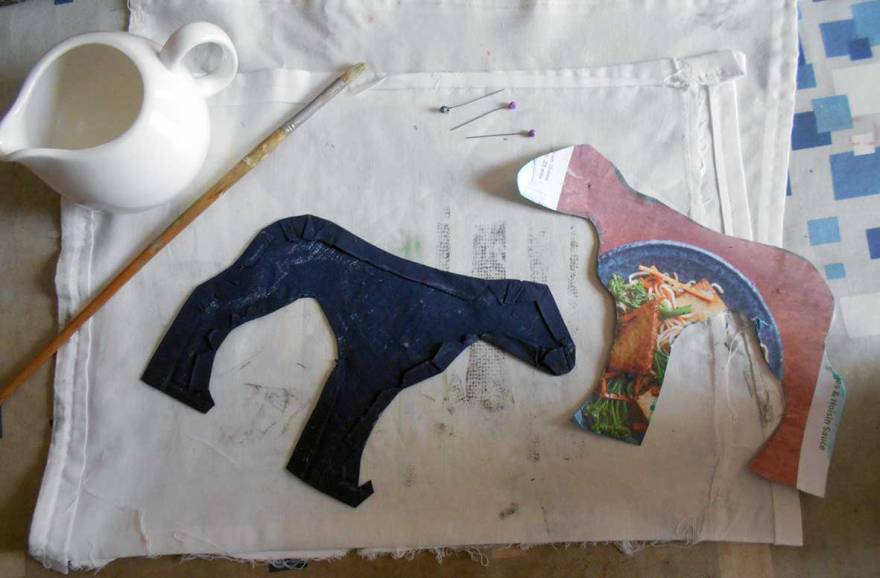
Inspired by such glamorous bravura I began sewing the cowgirl shirt. Initially my idea was to screen print my own embellishments on at the end. Ironically though, the risk of ruining the shirt after several hours work discouraged me from screen printing directly onto it – that’s not very brave is it? Instead I decided I would print my motifs onto scraps of the same fabric and applique them on.
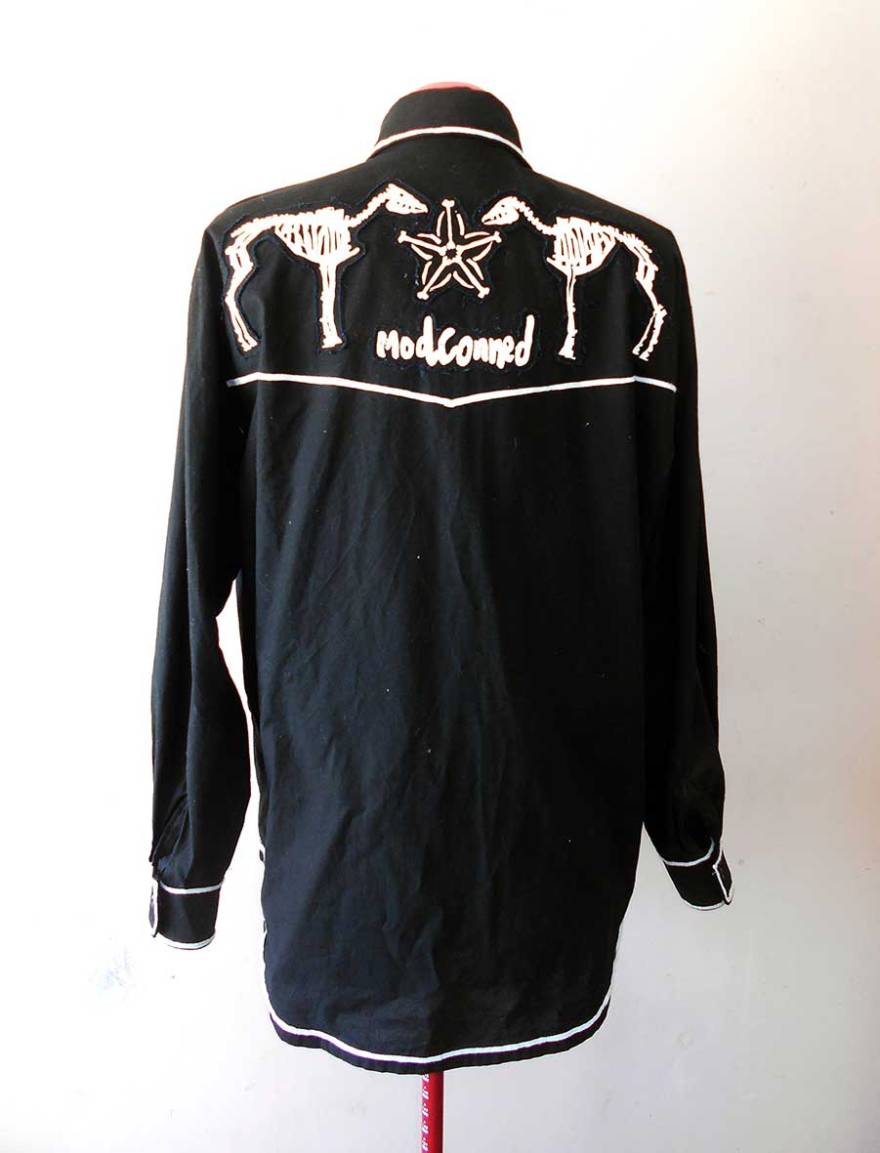
Next came the embellishments. A little research revealed that Napoleon named his favourite war horse after his 1800 victory against the Austrians at Marengo in Italy. After Napoleon’s defeat Marengo, the Arab stallion, was acquired by the British. When he died Marengo’s skeleton was preserved and now forms part of an exhibit in the National Army Museum.

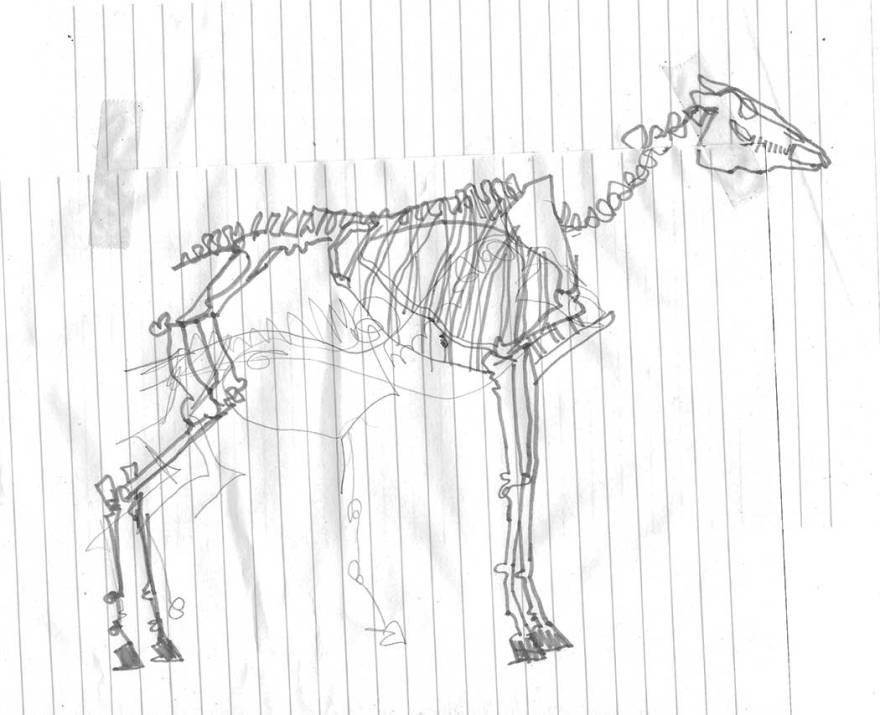
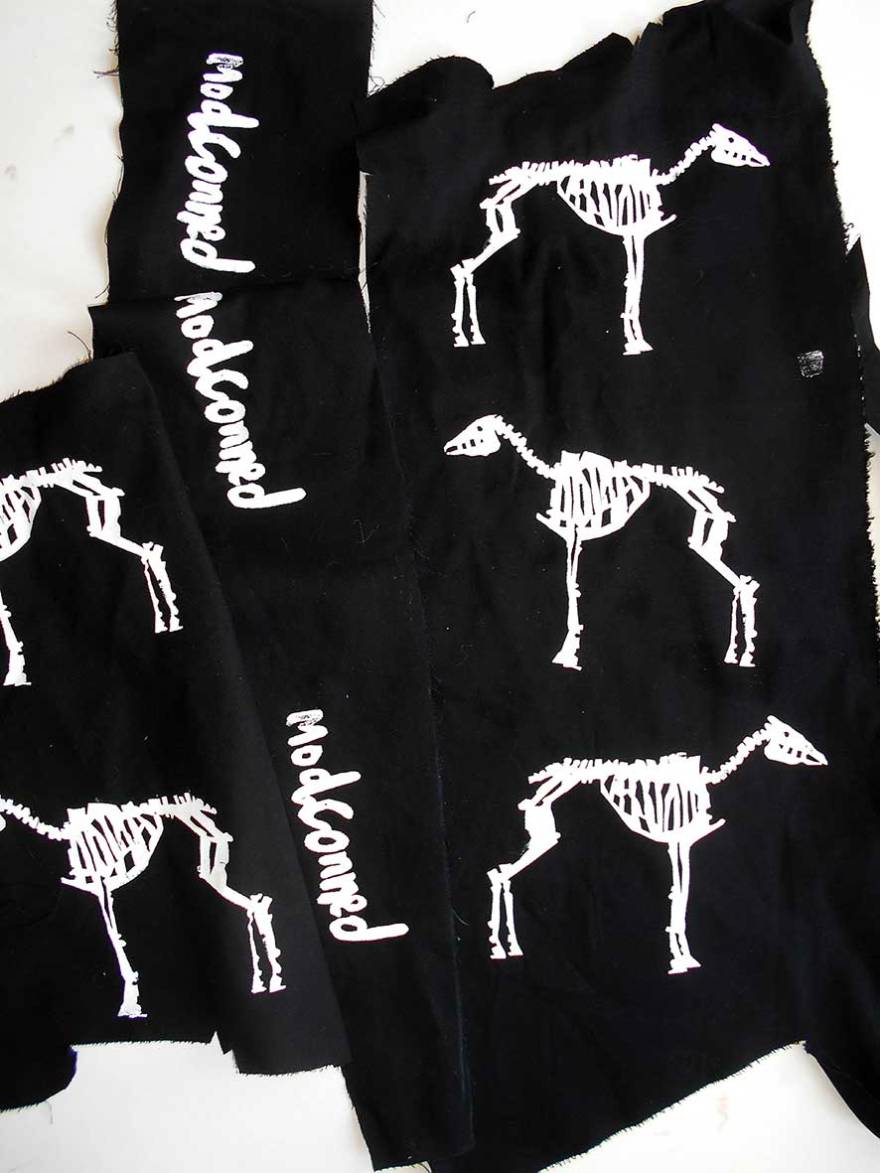
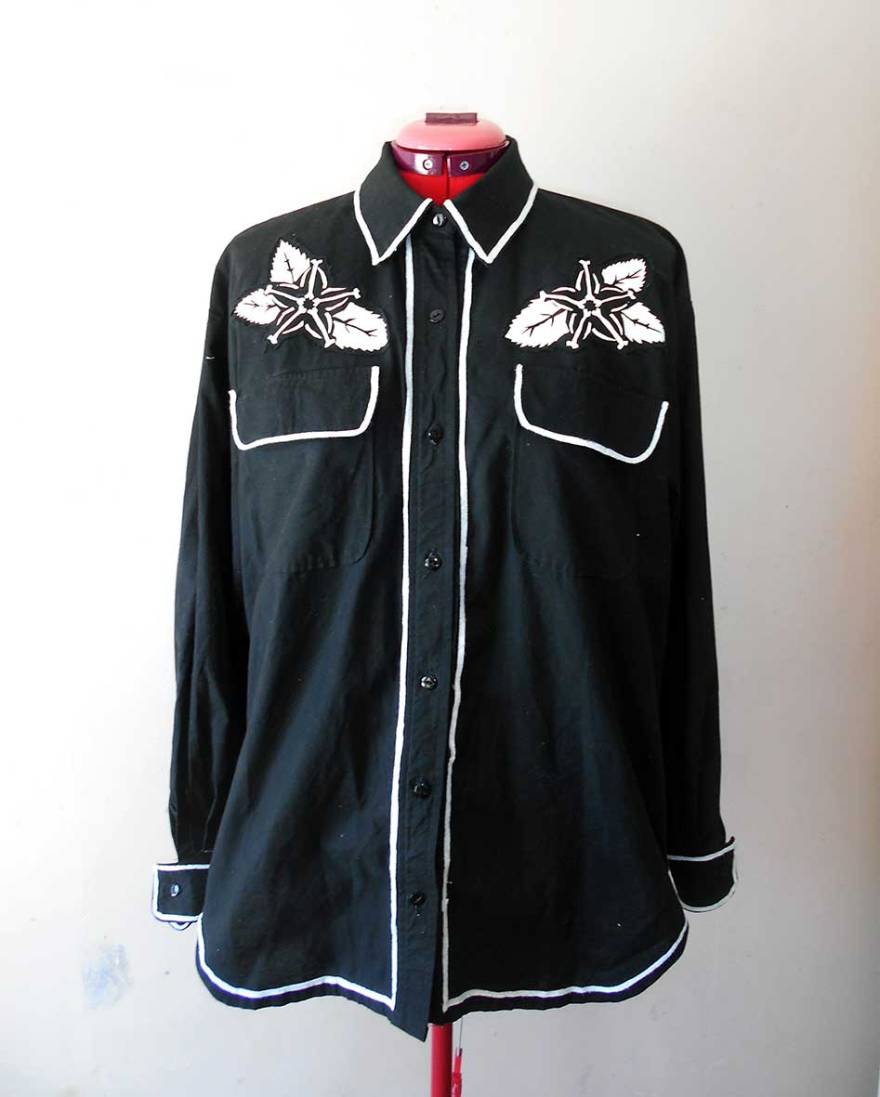
To create my screen print embellishments I sketched Marengo’s skeleton using references from the National Army Museum’s online collection. I cut the sketch into a stencil using self-adhesive contact. It’s a fiddly process but the stencil look is bold and cartoonish which reinforced the sense of pastiche I was after. I prepared a stencil for my “mod conned” lettering too. And finally I devised a “bone flower” motif to carry the skeletal theme through to the front of the shirt.

At first I tried to applique with a turned under hem but it looked really cruddy so I stopped…After a quick test I decided that raw edge applique, which is much simpler to do, actually looked a lot better. After basting I used matching thread to stitch everything in place.
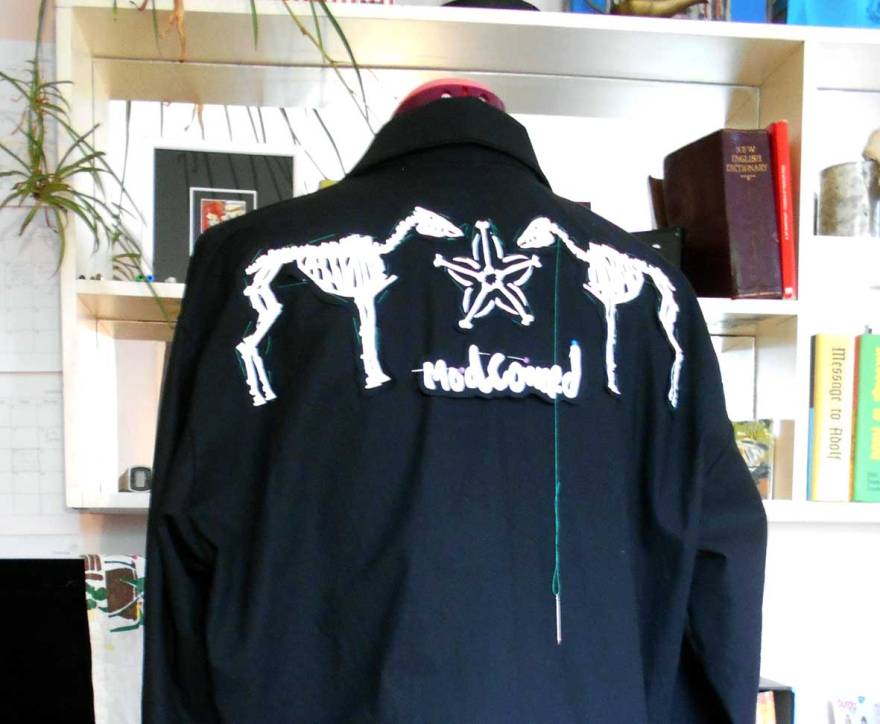
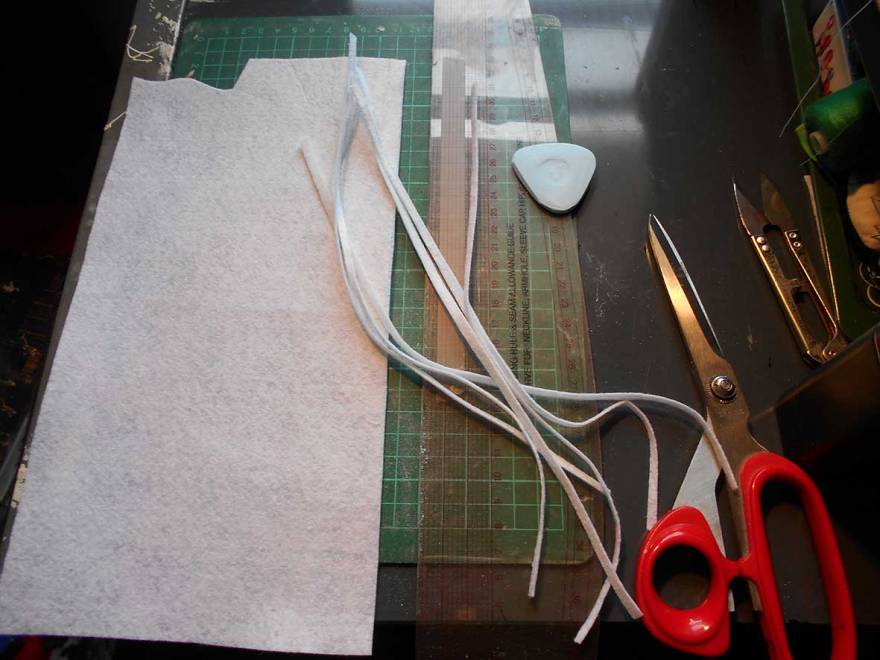
At this point I felt like the shirt could stand to yell COWBOY a bit louder so I took a chance on emulating piping with strips of white felt. I cut lots of strips and sewed them on with white thread on top and black thread in the bobbin. I overlapped the ends as I sewed to make long continuous lines. I think the result is effective and amplifies the graphic boldness of the screen print appliques. I’ve washed the shirt several times since making it and the felt has held up fine so far.
After the shirt was done I began drafting the rest of the ensemble – a camisole top and a mini-skirt with yoke and pockets. The cami was something I concocted through trial and error.

I wanted to see if I could create an interesting stepped edge neckline. I knew I wanted to wear the cowgirl shirt open so needed something a little decorative underneath. I considered a lace inset but opted for the graphic look of geometry to match the stark black and white boldness of the cowgirl shirt. I used a facing to help form the crisp angles of the neckline. The cami is cut on bias I can’t remember why I did that…perhaps I thought it would drape better, if I was to do it again I wouldn’t bother because it meant seaming the pieces together at centre front and I think that detracts from the design.
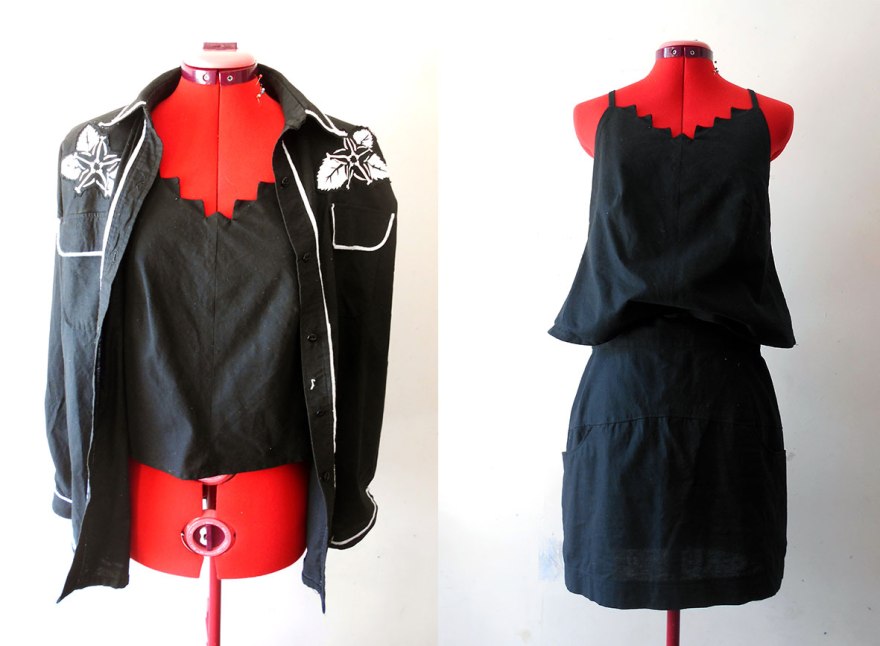
The mini skirt was relatively simple to make. I followed Global Fashion Workshop’s informative videos (see part 1 and 2). I also used their guide for sewing a vent to complete the back of the skirt.
See the whole look modeled in my previous post Fashion Farm 2020! And if you’d like to see more experimental fashion projects take a look at Do-it-yourself Fashion Statements.

_NRFPT_01.jpg)