
Framing artworks is a big job! I know because I’ve just finished a whole bunch of them. In my opinion its worth doing it yourself because a frame doesn’t have to be a simple accessory it can add conceptual reinforcement to an artwork in a subtle way.
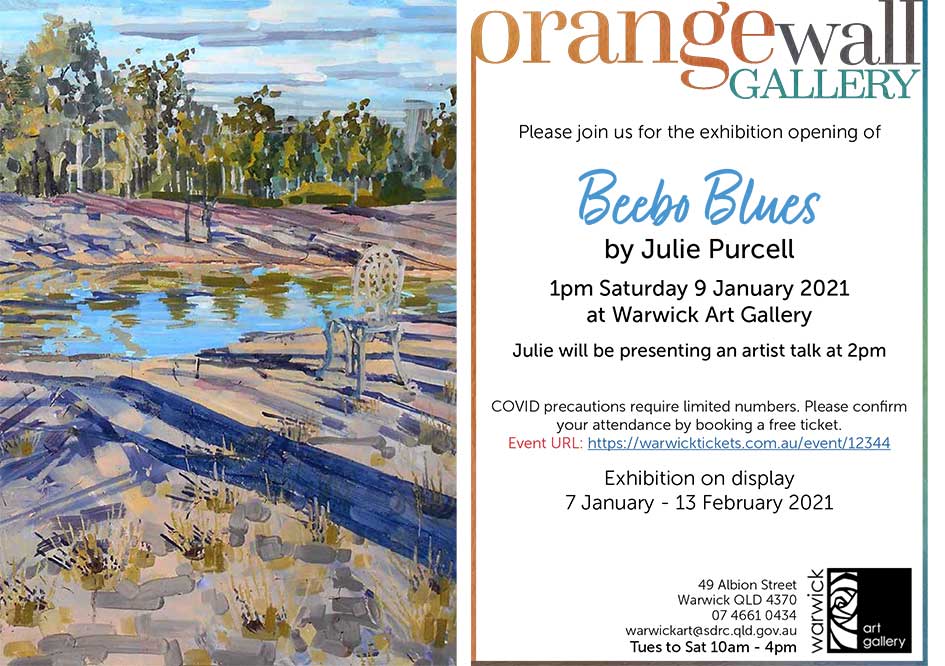
This month I’ve been busy constructing bespoke picture frames for my upcoming painting exhibition Beebo Blues – opening in early January 2021. My paintings are studies made on location at our family property in Beebo South-West of Brisbane. The place once belonged to my Grandad. By way of building and farming projects his effects on the landscape are still evident today. He was a hard worker and I remember him perpetually dressed in pale blue overalls. Though gone now, every glimpse I catch of pale blue in the sky, water or structures reminds me of him in his favourite work wear, hence the title Beebo Blues.
After his passing in the mid 2000’s my family created a native hardwood tree plantation in the paddocks he initially formed. I wanted to honour this literal link to the Beebo landscape by framing the paintings using salvaged tree stakes from our plantation. Tree stakes are used in the initial stage of planting they help hold a tree guard in place and can provide support for a young tree as it grows. After the tree has sent down a healthy tap root the stakes are no longer needed and tend to rot away over time. I used a combo of leftover unused stakes and ones reclaimed from our most recent planting site established in 2018.
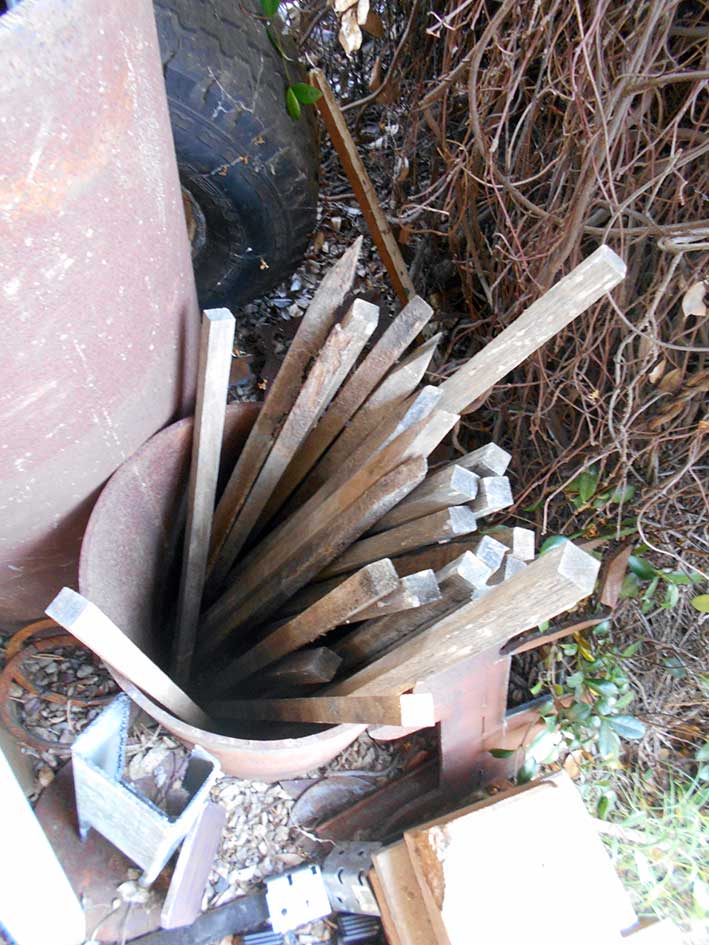
As a ready-made item the stakes are 600mm long and 25mm x 25mm deep. They’re manufactured from reclaimed native Australian hardwood which is a by-product of commercial timber production.
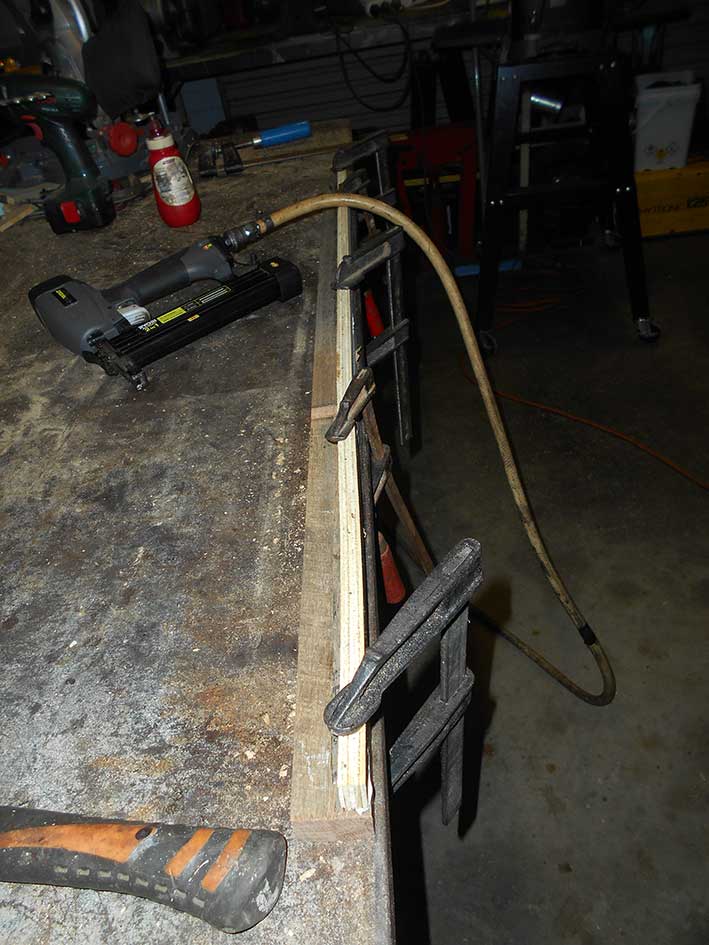
Since many of my paintings are larger than 60cm wide/tall it was necessary to join stakes together to create longer lengths. Because I wanted a deeper frame I chose to laminate the stakes together to create a double thickness. These “stake sandwiches” were then clamped, glued and screwed to make a strong laminated composite. Once laminated I marked out where I wanted to join the stake sandwiches in order to make longer spans.
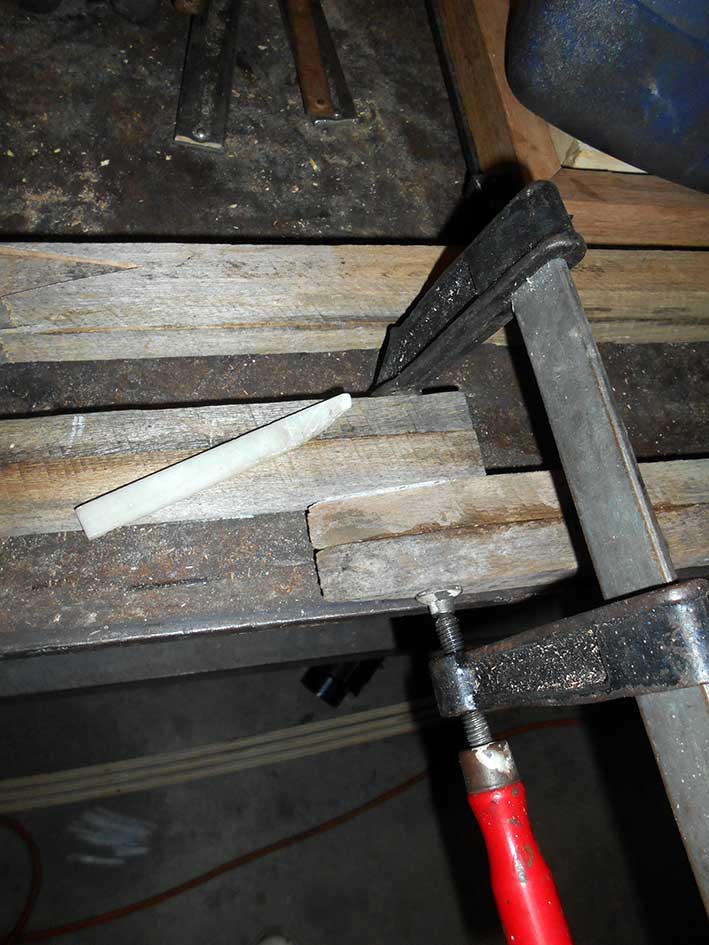
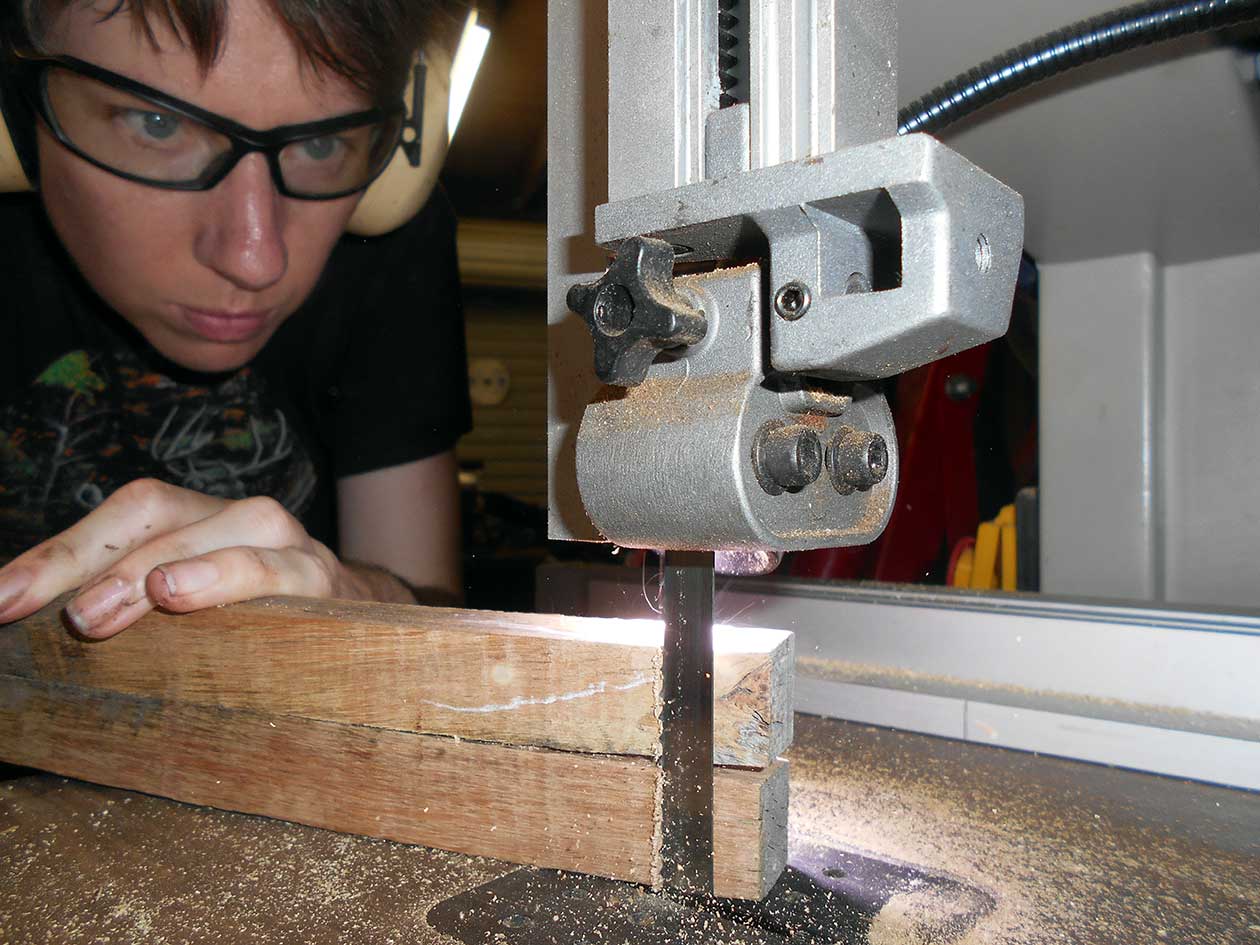
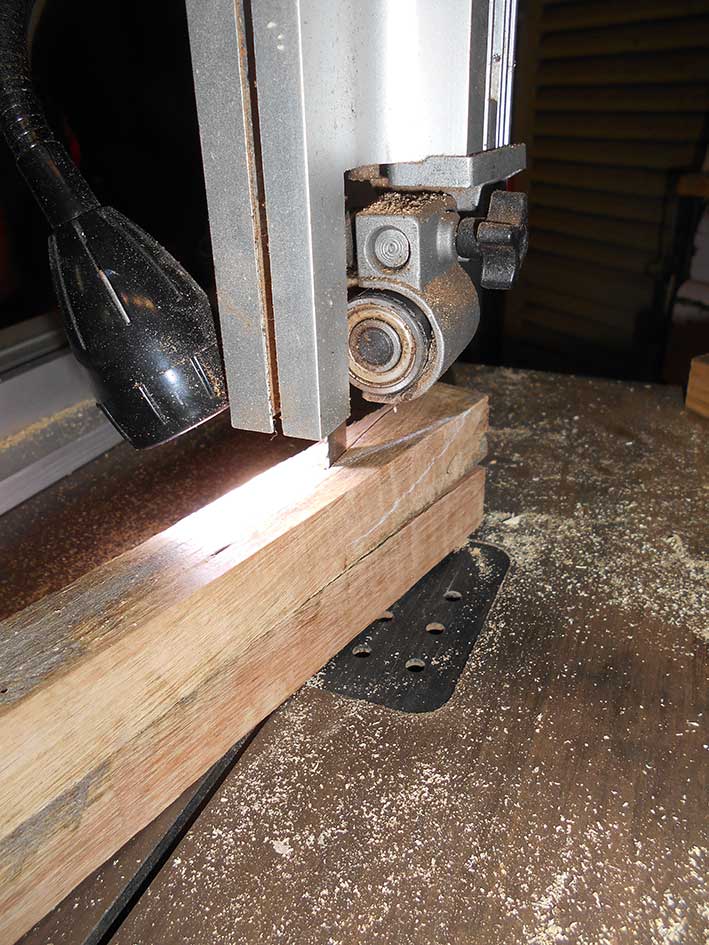
I used the band saw to make v-shaped cut outs in the end of one stake sandwich then inset the ready-made pointed end of another stake sandwich into the cut-out to join the pieces. These were then glued and nailed together to create a long composite section.

Once joined into long lengths I ran the “stake sandwiches” through a thicknesser to plane off the degraded surface on the fronts and sides. I left the backs raw because I like the origins of the material to be quietly evident there.
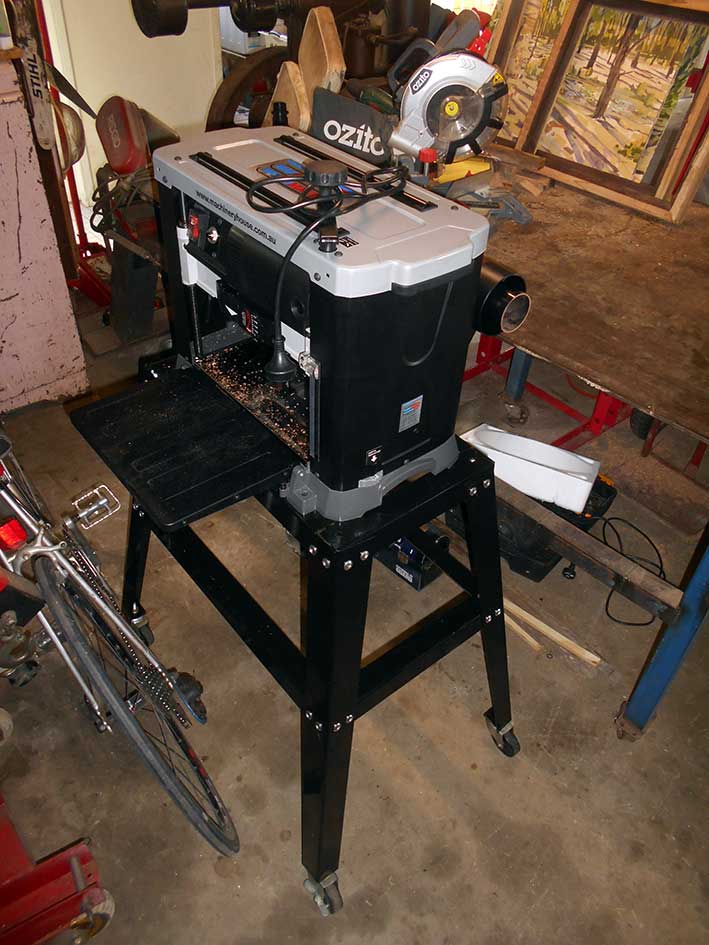
The thicknesser shown above is the newest member of our family workshop. It’s an automatic planing machine. Using it meant that I no longer had to manually dress the timber with a handheld electric plane which was time consuming and a source of repetitive strain on my wrists and hands. For a frame or two the manual method is bearable but not for the volume I need to produce for this project which is ongoing.

I then attached a plywood “shelf” to my tree stake lengths – this helps me to float the painting inside the frame providing somewhere to attach the painting to. I cut my plywood strips to the desired width on the band saw then attach to the tree stake lengths with glue and nails.
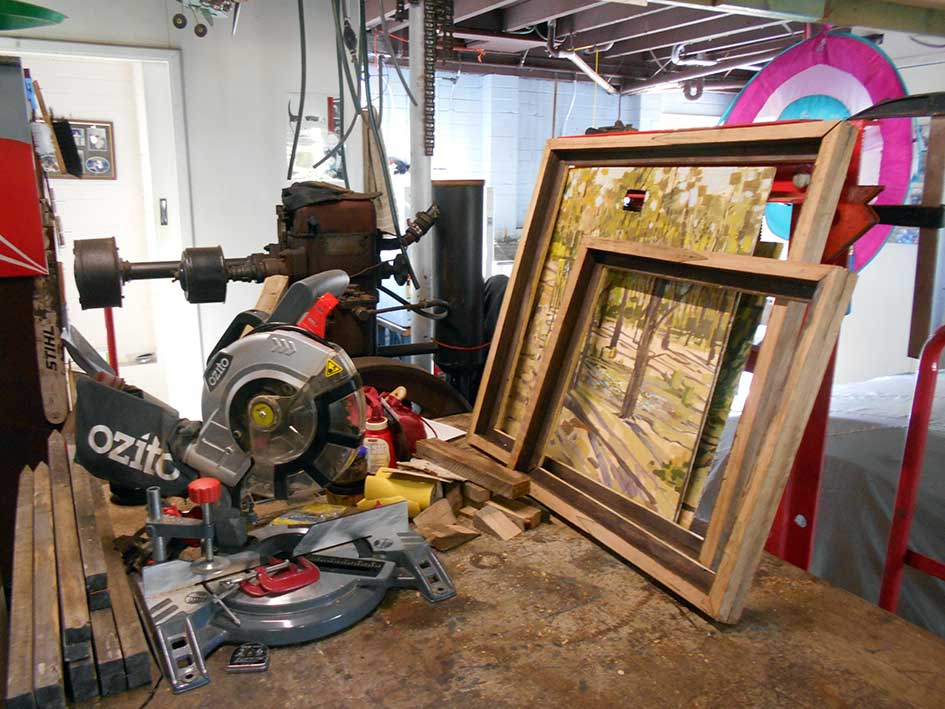
Once my stake lengths have shelves attached I start the process of cutting down to size to fit my paintings. I like to spread out on the ground for this stage.
I tend to do this bit by eye…what? I’m an artist not an engineer! I rest the painting on the shelf of the frame piece then decide where I want my mitre cuts – factoring in a shadow gap. I start with the top, then move to a side, when happy with these I simply copy the pieces to finish the frame. The mitre corners are cut with a drop-saw.

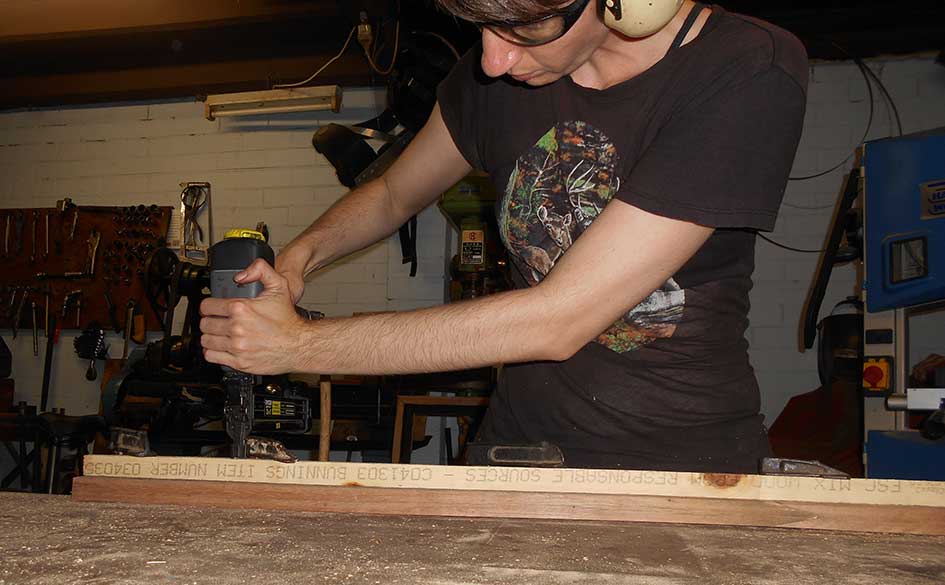
When I’m ready to assemble I glue and nail the frames together with the aid of a band clamp that holds the corners tight together. The final step was to paint the inside of the shelf and inner edge a darker umber tone to help the shadow gap effect and then one last sand to neaten everything up.
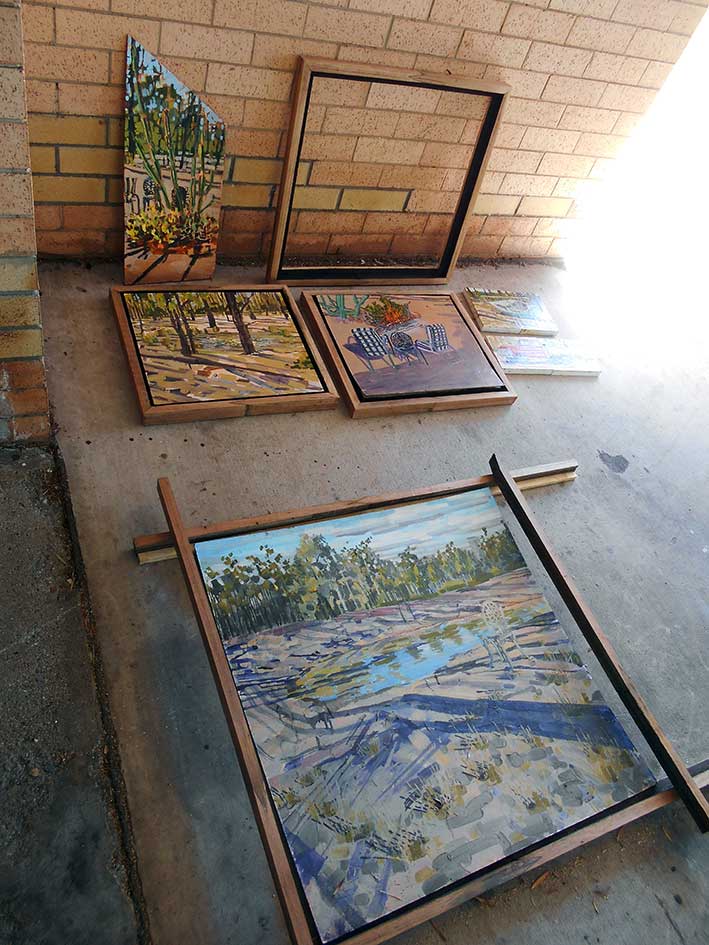
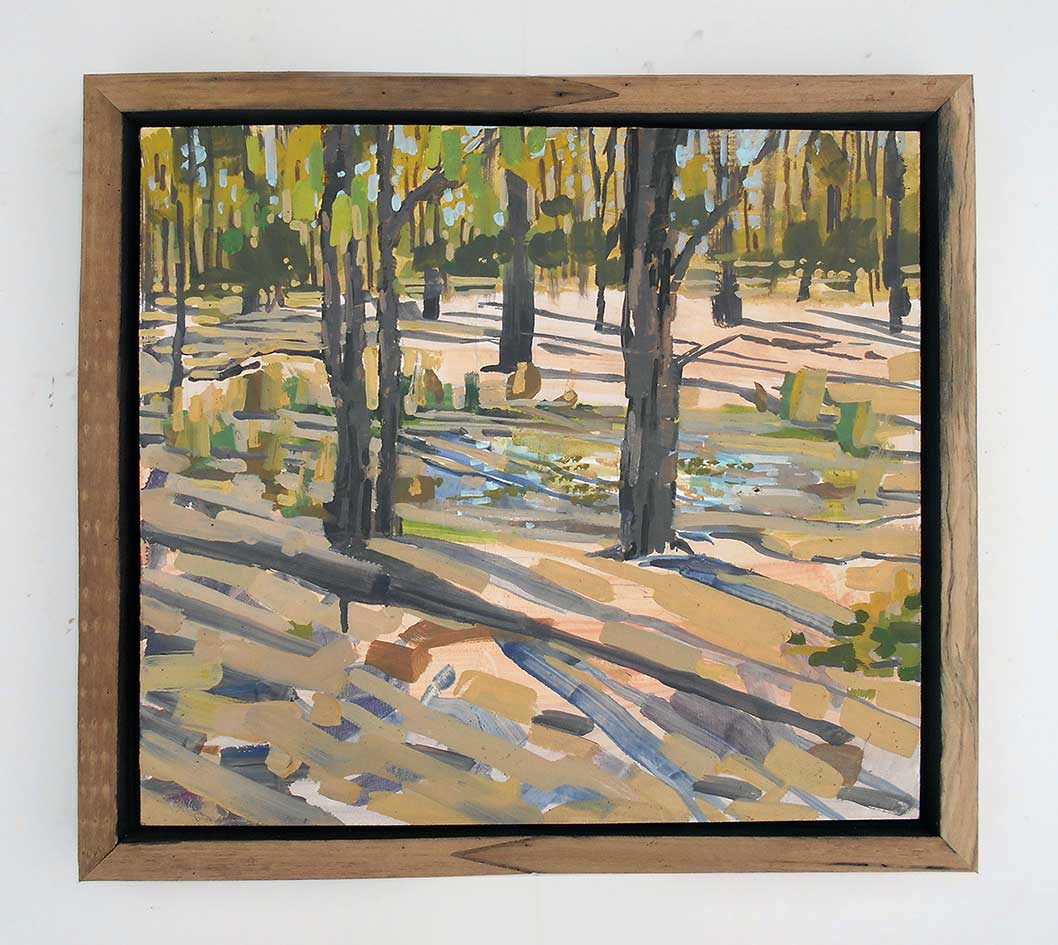
And here is an example of the finished look – the effect is neat but still has a sense of reclaimed wood texture and charm. I became more aware of positioning the inset v-shaped parts of the stake frames as I worked, in some cases using them to suggest a gentle circuit of flow around the work like in this painting Lilly Dam.
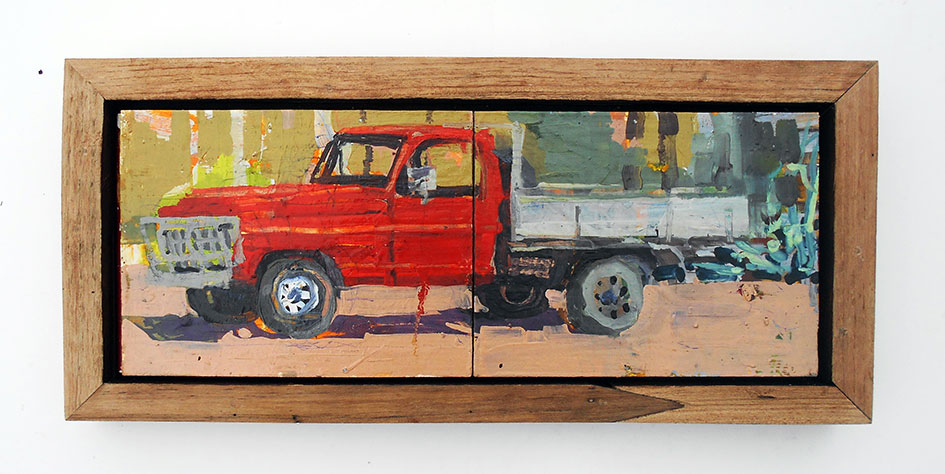
In other cases like in the painting of Dad’s Truck the arrow seems to allude to movement by counter-balancing the direction of the truck.
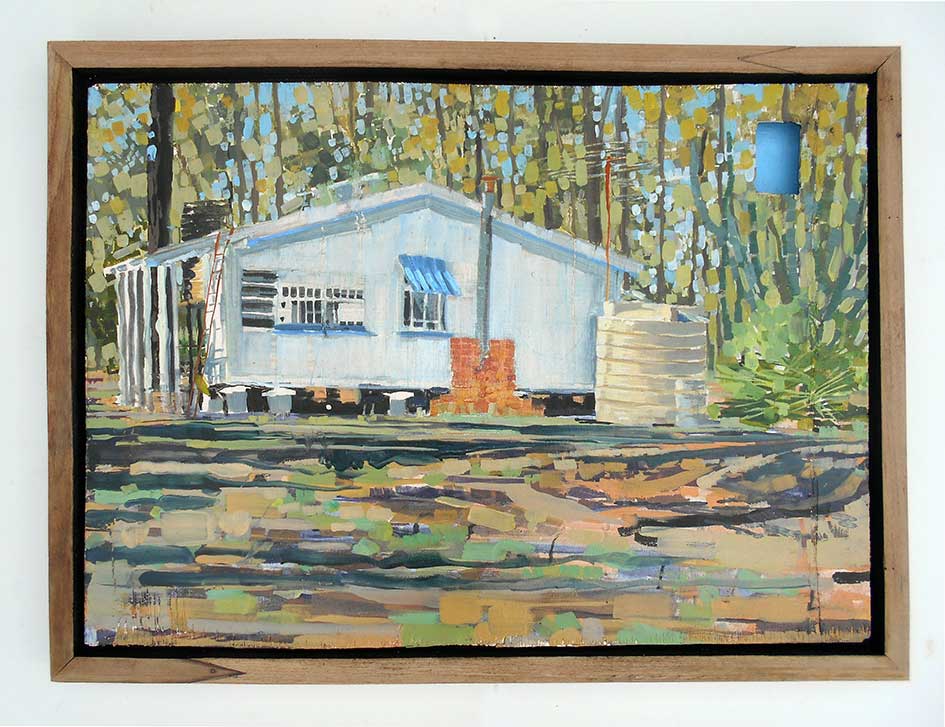
Finally in the image of the Workers Cottage the arrows were placed off-centre to support two areas of particular interest in the surface of the painting. All works were painted on salvaged board which imbues them with ready-made texture and lived-in wear and tear as a gesture informed by the idea of imperfect perfection.
Frames really do offer an overlooked opportunity for design that can speak to the content of an artwork. And of course its also economical to do it yourself. In this instance I was able to create 10 frames from found materials at very little cost other than electricity and a few consumables. If you’d like to see how I tackled another creative bespoke framing project visit my earlier post The Other Side of Alice to see how I conceptually resolved a mixed-media life drawing on board via the framing process.
Beebo Blues opens at the Orange Wall Gallery at Warwick Art Gallery on January 7th 2021. I’m delighted to be presenting an artist talk at the official opening on January 9th. The show runs till February 13th. Click here for more details.
*UPDATE 19/01/20*
Artist Talk has been postponed until 30th of January due to a sudden Covid-19 lockdown earlier this month. Contact the gallery for event and booking details http://www.warwickartgallery.com.au/exhibitions.html.

Looking forward to seeing the finished pieces in person. Way to go!
Thanks Chrissy, I hope you will like them 😀